Install a new Digital Speedometer in a Harley Davidson Sportster

The Harley Davidson Sportster appeals to me because it’s a classic bike that looks great and is very powerful. You never look like a douche when you are sitting on a Harley!

3136

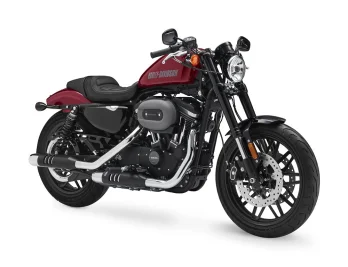
I bought a used 2009 model a few years back. It looks very much like the picture above. They don’t really change over the years other than maybe the seat or the shape of the tank. That’s also part of the appeal.

The only thing that bothers me about it is the lack of information on the gauge. There’s no gear indicator other than neutral and no RPMs. All you get is the odometer and the MPH. I’m not one to accessorize something this cool and I love the stock look of the bike. In fact, I took parts off of it! Replaced the upgraded shifting pedal to the stock one and took the engine guard off the front. There’s a seat rest on the back that I want to take off. But an upgrade to the gauge would be a worthy and needed change!

I bought the combo speedometer/tachometer from my local Harley Davidson dealer. My main concern was how to install and how not to screw up the linking of the odometer information. You have to link the new gauge to the bike and sync the data from the old one. I’m going to lay out how I did this successfully with pictures.

Reference data:

Part: Combination Digital Speedometer/Analog Tachometer-70900274

Combination Digital Speedometer/Analog Tachometer-70900274 Installation Instructions

Please use the instructions that came with the gauge and use my guide as a reference. I am not responsible for any damages you do to your equipment. I am just providing a reference. If you see any errors in my information, please contact me using the contact page! Good luck and safe driving!

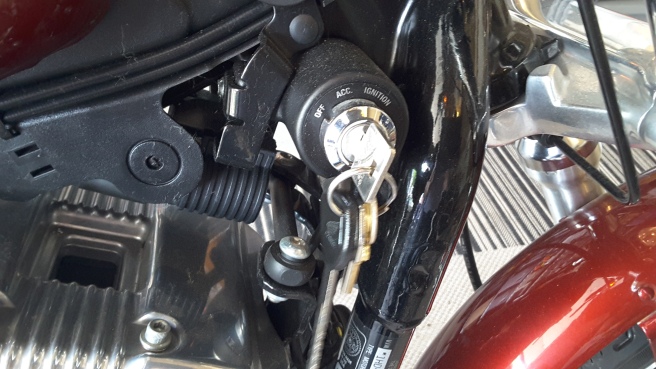
Open the access panel on the left side of the bike to gain access to the data link port and the fuse. Take the fuse cover off (see: the green fuse).

20170625_125311

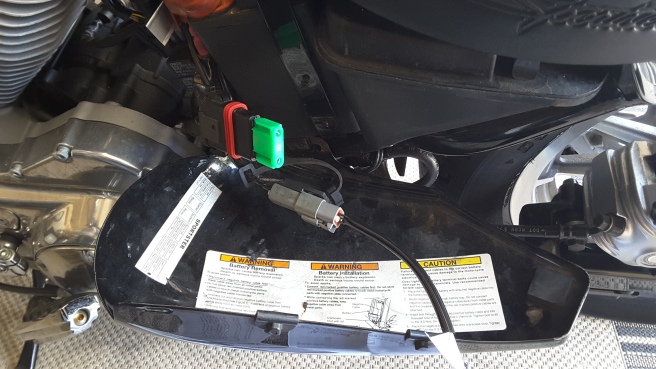
Next, remove the rubber plug from the data sync cable on the Harley. You are going to plug the jumper that came with your new gauge into the bike’s data cable and on the other end you will plug into the new gauge. Take note of the key on the connector that goes into the gauge. It faces downward.

20170625_125450

Jumper data cable is installed. Ready for sync.

20170625_125509

Turn your key to the ‘Ignition’ position. The data will sync very quickly and display “OK” when it’s done. In my case, the first time it said, “FAIL” which freaked me out. I disconnected the cable from the bike’s data connection and reconnected. It synced that time. Took a couple seconds. *relief*. Replace the rubber plug on the data link port on the bike and turn your key back to the ‘off’ position.

20170625_125603

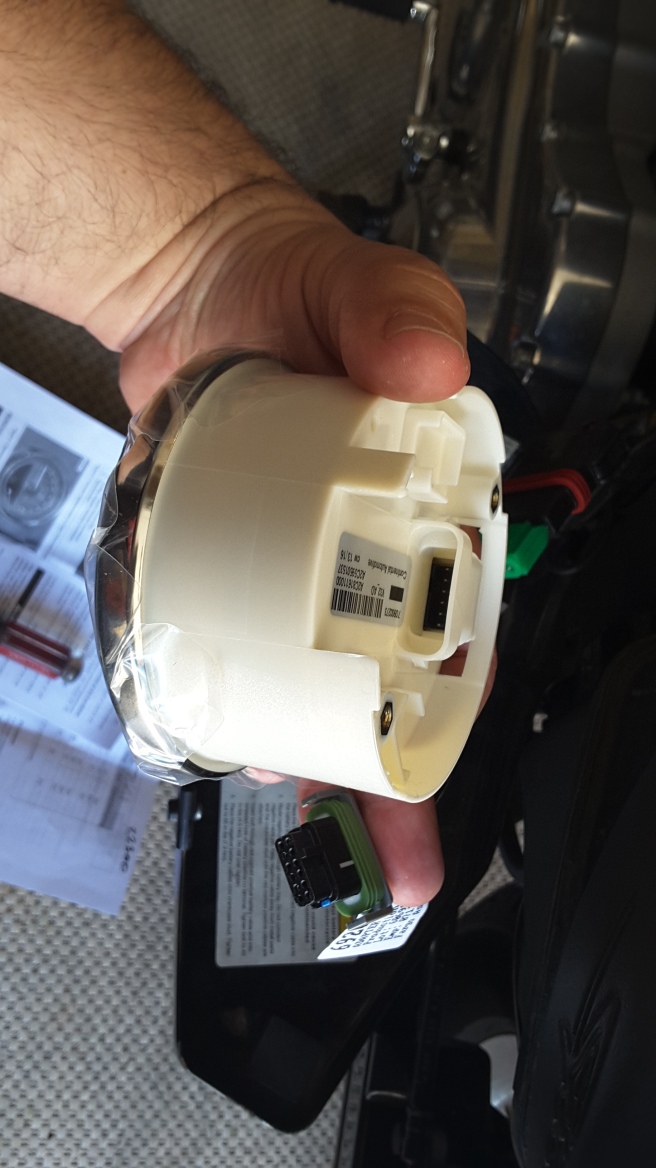
Now we are going to install the newly synced gauge. According to the instructions, the first thing you should do is remove the main fuse (the green fuse from the first step.) Remove the two 1/4″ Allen head bolts from the top side of the gauge. Carefully flip the gauge assembly over and remove the (2) 3/32 allen screws from the back plate.

Take the back plate off. Put all of the hardware together in safe place so you don’t lose it. Carefully remove the seal.


Disconnect the connector and carefully move the trip odometer button assembly to the side. Carefully pull the gauge out from the top side and remove the seal. Clean the seals if they are dirty with soap and water. The old gauge is free and now you can reverse the assembly process with your new gauge.

Center the gauge before you tighten it down. Once it’s installed, you can plug your fuse back in and put the cover back on it. Put the black metal cover back on because you are almost ready to go… Turn the ignition back on and check out your odometer reading.  If you are successful you can go back to the instructions to see how to customize your new gauge. If not, see the troubleshooting section in the instructions. I hope this guide was helpful!


Deep Cleaning Vinyl Records

There are many ways to clean vinyl records. No one way is the best but I feel like mine is the most thorough.

First I start by gluing the record. GLUING you ask? Won’t that ruin the record? If you use the wrong glue, yes. But if you use Titebond II, which you can find in any hardware store, you will see good results. The Titlebond II (don’t use Titebond I!) formula works by covering the grooves and hardening to a flexible vinyl negative. When you peel it off, it takes the junk off the surface and pulls out the junk deep inside the grooves. You will be very surprised at how older, seemingly scratchy records looks afterward.

Start with three things:
1. Titebond II glue
2. And old plastic card
3. Preferably a turntable but use a soft disposable towel as a second choice.

Later you will need a steamer and a wet vac with a modified wet vac tool (or a soft clean cloth).

File_003

While the turntable is running at 33.5RPM, apply the glue in a spiral by just moving from the label toward the outer edge. Be careful not to get glue on that label and don’t overrun your glue past the record’s edge. *If the glue seems a little thin, stop the record and add some more glue across the spiraled glue (see the third picture).

Hold the plastic card at a low angle (30 degrees or less) and smooth out the grooves. I usually press hard to make sure the glue is getting down in the grooves. Move the platter around with your thumb and go over your work to make sure you have uniform smoothness on the outer and inner edges because you don’t want strays of glue gobs.

Once the glue hardens, you can flip it over and glue the other side. Then when the record is done, you can peel the glue off to reveal your clean record! Some tips on drying: Place the record(s) near a fan to ensure faster drying. Do not set out in the sun! Note that the glue does give off a smell so do this in a room where you can close the door.

When both sides are finished, on the very edge of the record, agitate the glue with your fingernail and start peeling the glue back. Take your time because you don’t want any areas to tear off. They are very difficult to get off if that happens but what I have found easiest is to use masking take to pull up any stranded glue. An important note: if you had put on too thin of glue, you will have a mess on your hands as the glue has little elasticity. Be generous and refer back to the “*” above. The third picture shows a side where there was too little glue. I had to peel from the label side and ended up with a mess.

Now that we have a very clean copy of our record with years of dust and gunk removed, we will steam clean it to remove the static that formed when the vinyl/vinyl glue were separated. You will notice that your record now attracts a lot of dust. The steam cleaner will discharge that static and make your record optimally clean and ready to play/record. **Use distilled water in your steamer. Pre-heat for at least 15 minutes. This is important.

While the record is moving, run the steamer from the outer edge to the label and then back again. Move slowly but do not stop because you can damage the record. IMG_0823

Now you will want to vacuum that water if possible or use a soft, clean cloth. I use a small wet vac. I took one of the wet vac tools and cut a slit on the bottom with a dremel. Then I hot-glued a piece of cloth (ripped off of an old RCA Discwasher brush). Then cut a slit in the cloth with an x-taco knife. Put a piece of tape on the end to cover the hole and presto! A very effective way to vacuum water off of the record, leaving no debris behind (see first picture). Much cheaper than a $500+ VPI record cleaning machine!

If you are using a cloth, wipe in the direction of the grooves, not against. If using an improvised wet vac tool, run perpendicular to the grooves and move the platter very slowly with your hand to ensure it pulls all of the water/debris out.

Congratulations! You now have a VERY clean record, perfect for archiving. I really need to upload a before/after clip so you can see how incredibly quiet the record is after this cleaning. In addition, if you hacked your wet vac tool, you can steam and vacuum new records to clean them up (new records have mold-release chemicals on them from the manufacturing) and get rid of the static.