My latest artwork “Pressurized”:
https://society6.com/product/pressurized_print#s6-7012516p4a1v45


Here are some tips for keeping your Android phone or tablet safe. As you may know, the Android phone platform is not very secure. It can be hacked/compromised through a variety of methods which I will get into through subsequent posts.
Is an iPhone safer? Out of the box, yes. But the advantage with the Android OS is that there are many security programs in the Google Play Store. There are many options not available in the walled garden we call the Apple iTunes App Store. iPhones are still subject to hacking, fishing, wifi and http spoofing, etc.
A Virtual Private Network (VPN) is a secure connection to a remote server that allows you to hide your IP address. This is beneficial for a variety of reasons. Region-restricted websites can be reached, your location and personal IP is masked from spies and trackers, bypass internet censorship for users outside of the United States (and U.S. residents who are on restricted WiFi access) and for downloading files over Bit Torrent.
Most VPN connections are made on a mobile platform through an app. It is usually easy to use – a simple click of a virtual button/switch and you are off the races. Make sure you add a bookmark in your browser to check your IP address to verify that you are really masking your IP address.
Most security-minded tech users are well aware of this first line of defense. There are many VPN options, most of which are pay-to-use, including Private Internet Access (PIA), KeepSolid, PureVPN, and IPVanish. I encourage you to look into all the options and consider that you do get what you pay for. Avoid “free” options as you are likely to be looking at a faulty service that may sell your data, show ads and create a false sense of security. Personally, I use Private Internet Access VPN, which does not store logs of your use, works on your PC, Mac, iPhone, and Android platforms. There’s even a linux Ubuntu option. The service at the time of this post is $6.95/mo and $39.95/yr, which is divides out to $3.33/mo.
I can’t explain it better than Wikipedia:
Tor is often used without VPN but I encourage you to use it with VPN. While Tor was seen as uncrackable, both governments and bad actors have discovered ways to unmask your Tor connection. This has scared many away from Tor, but rest assured that if you use an underlying VPN and aren’t up to devious/criminal behavior, you are likely safe to use Tor as a valuable privacy/security tool. If you are unmasked, the VPN will still show your VPN IP address. Here’s my humorous way of looking at it: Orbot is like pants, VPN is like underwear.
Using Tor is a two step app process. Download Orbot and Orfox from the Google Play Store. Both are free apps and were created by the Tor Project. Once downloaded, you will want to click on Orbot first which will create your Tor connection. Click start once in and the app will let you know if you are connected. This app will encrypt your internet traffic and will work with other Android apps, including Twitter, chat apps, web surfing, etc. Next you will want to open your Orfox app, which is a version of Firefox created by the Tor Project that will make sure your web communications are routed through your Tor proxy connection. Use this rather than Chrome, Firefox and your default web browser for private browsing. It is generally frowned up to log into bank accounts and other accounts that can compromise your personal security. If you need to check your bank account, do so with your real IP before you log into VPN and Orbot.
Once you are in your Orfox browser, you will see links to “noscript” and “https everywhere.” You will want to install these Firefox add-ons. Orfox will by design block the installation and will ask you if you want to proceed. Noscript is open source software that blocks JavaScript, Java, Flash and other plugins from untrustworthy sources from running and hijacking your Android device. Https everywhere will attempt to force all website connections on Orfox to connect with https, which creates an encrypted connection between your android device and the destination.
John McAfee, the notorious creator of McAfee Anti-virus, legendary internet security pioneer and expert created this $5 app on the Google Play Store that blocks bad actors from accessing your bluetooth, wifi, camera, and microphone. If something attempts to open a connection to these things, the app will prompt you. If you want to use the wifi or camera, you can override the software as needed. Very valuable tool in a day when these things can be remotely activated to spy on you in real time! Highly recommended app.
The older model Mac Mini circa 2005-2009 was a great PC alternative, measuring in at 2.0 × 6.5 × 6.5 inches instead of a huge beige tower. You can buy these old machines on ebay in the $50-$100 price range but their usability and expansion is limited by Apple. We will get around this!
The model I bought for $50 (that included shipping) was the Apple 2006 (model MA607LL/A) Mac Mini with a 1.66GHz [Intel Core Duo 2] processor, CD-R/W, 160GB Hard drive, and a measly 1GB of RAM.
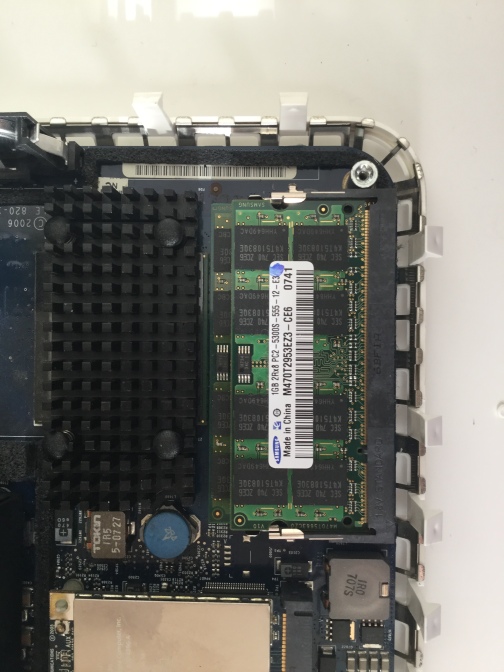
The RAM is expandable in this model to 2GB. There are two slots, so (2) 1GB RAM [DDR2 PC2 5300] modules could replace the (2) 512MB modules. RAM upgrade (both modules) for me cost a total of $6.40 shipped.
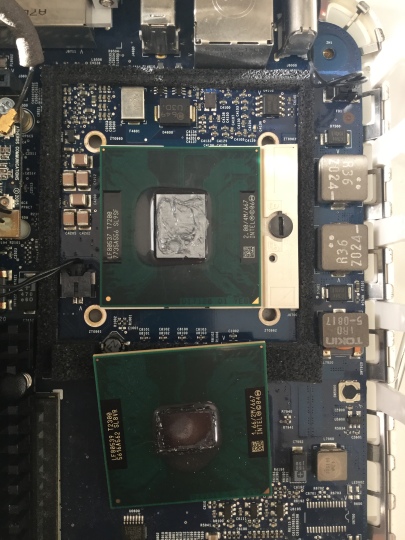
CPU being only 1.66GHz will need to be maxed out. The good news is that this machine’s CPU can be upgraded to a Intel Core 2 Duo T7200 mobile CPU 2.0 GHz. Total cost in my case, $7.65 with free shipping.
To get the case apart, you will need to flip the unit over and take a screwdriver and gently pry along the seam until you can pop the lid off. I recommend watching an instructional video. It’s not user-friendly but it’s also not that difficult. The video linked was made by The 8-Bit Guy and he goes over how to take the case apart, replace the RAM and Hard Drive (jump to 1:30 if you are impatient).
For the upgrade, once the lid is removed, you will remove the air port connector, the ribbon cable and a controller cable. Remove some screws (this is all shown in the 8-Bit Guy’s video) and the CD-RW can be moved out of the way for your RAM, CPU and/or hard drive upgrade. In my case, I left the 160GB hard drive in because there’s plenty of room for my OS of choice, Ubuntu Linux 16.04.
RAM: once the CD/RW is out of the way, this is easy. Pull the metal tabs back slightly on each side and remove the top RAM module. Repeat for the bottom module. Reverse this process when installing the newer RAM. This part is done.
For the CPU, turn that small screw you see in the picture on the CPU socket until you can free the CPU. Carefully place your 2.0GHz CPU in the socket and tighten the screw. Now apply a dab of thermal paste on the metal square on the CPU (as shown in the picture). Now you are done with the CPU!
If you want to continue with the hard drive replacement, please refer back to the 8-Bit Guy’s video. Carefully reverse the disassembly process and your machine should be a happily upgrade Mac Mini!
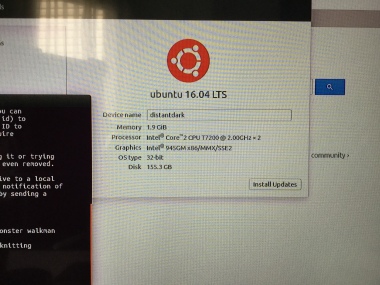
Now for the OS. I was unable and unwilling to get a new Apple OSX operating system on this box. Unable because it’s a huge hassle and I believe you can only upgrade to Mountain Lion. Unwilling because the machine has limited specs and you are not going to get a good experience using this machine with OSX. Ubuntu Linux however will run VERY WELL! In fact, once I upgraded the OS to Ubuntu the machine ran quite nice and I’m able to do pretty much everything I normally do without any lock-ups, spinning wheels of death or slow downs. It’s not a rocket but it’s definitely usable and enjoyable.
To get Ubuntu Linux on your machine, visit the Ubuntu Desktop download section and download the 32-Bit ISO image. Now that you have the image, you will need to put it on a flash drive with your computer. In my case, I used a tool called Apple Pi Baker, which is also a great tool for flashing SD cards for Raspberry Pi. If you have windows or Linux and want to do this, I suggest looking for a good instruction video.
This is an important step: Installing the rEFIt boot menu for the Mac Mini. Go to the rEFIt Project page and download. Then install rEFIt. This will allow you to boot your the Ubuntu installation you flashed onto the flash drive.
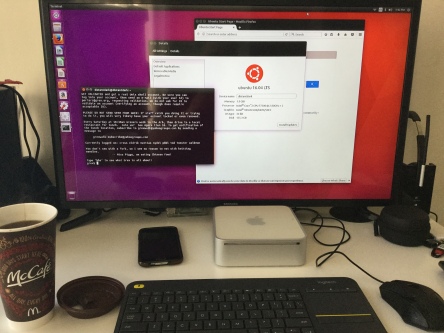
Once you place the ISO onto the flash drive and install rEFIt, you will put it in your newly upgraded Mac Mini and hold the “Alt” key after you turn it on. Choose the Flash Drive and boot into Ubuntu and install. I chose to overwrite the entire drive since I do not plan on using this machine to run OSX. Once this process is complete, you will be enjoying a very inexpensive computer that has a low-power usage and fits in a very small space. In addition, Linux is cool and you can brag to your friends. 😉
I am using a 32″ Samsung TV for the monitor. I needed to use a DVI to HDMI converter for the video signal. This is my setup!