The older model Mac Mini circa 2005-2009 was a great PC alternative, measuring in at 2.0 × 6.5 × 6.5 inches instead of a huge beige tower. You can buy these old machines on ebay in the $50-$100 price range but their usability and expansion is limited by Apple. We will get around this!
The model I bought for $50 (that included shipping) was the Apple 2006 (model MA607LL/A) Mac Mini with a 1.66GHz [Intel Core Duo 2] processor, CD-R/W, 160GB Hard drive, and a measly 1GB of RAM.
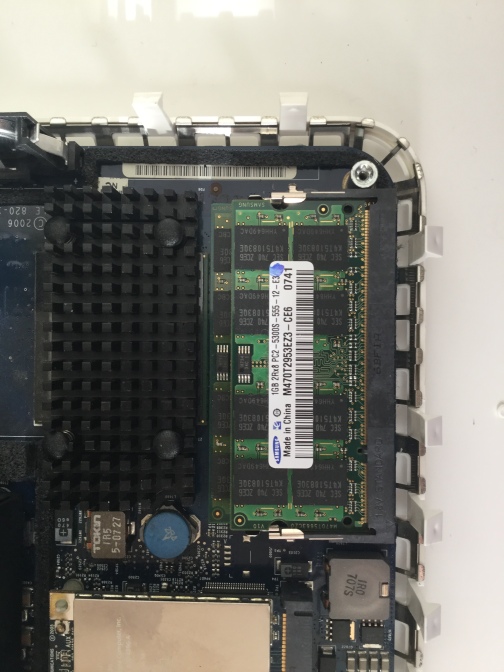
The RAM is expandable in this model to 2GB. There are two slots, so (2) 1GB RAM [DDR2 PC2 5300] modules could replace the (2) 512MB modules. RAM upgrade (both modules) for me cost a total of $6.40 shipped.
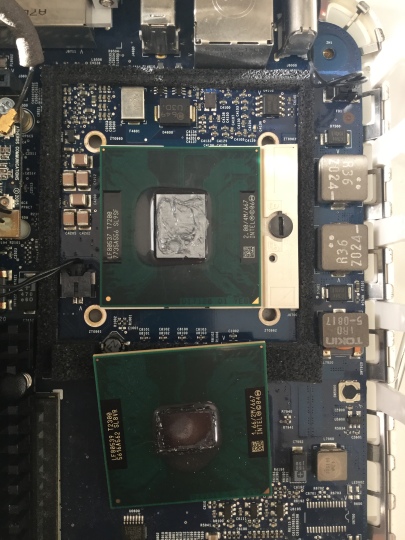
CPU being only 1.66GHz will need to be maxed out. The good news is that this machine’s CPU can be upgraded to a Intel Core 2 Duo T7200 mobile CPU 2.0 GHz. Total cost in my case, $7.65 with free shipping.
The Upgrade
To get the case apart, you will need to flip the unit over and take a screwdriver and gently pry along the seam until you can pop the lid off. I recommend watching an instructional video. It’s not user-friendly but it’s also not that difficult. The video linked was made by The 8-Bit Guy and he goes over how to take the case apart, replace the RAM and Hard Drive (jump to 1:30 if you are impatient).
For the upgrade, once the lid is removed, you will remove the air port connector, the ribbon cable and a controller cable. Remove some screws (this is all shown in the 8-Bit Guy’s video) and the CD-RW can be moved out of the way for your RAM, CPU and/or hard drive upgrade. In my case, I left the 160GB hard drive in because there’s plenty of room for my OS of choice, Ubuntu Linux 16.04.
RAM: once the CD/RW is out of the way, this is easy. Pull the metal tabs back slightly on each side and remove the top RAM module. Repeat for the bottom module. Reverse this process when installing the newer RAM. This part is done.

For the CPU, turn that small screw you see in the picture on the CPU socket until you can free the CPU. Carefully place your 2.0GHz CPU in the socket and tighten the screw. Now apply a dab of thermal paste on the metal square on the CPU (as shown in the picture). Now you are done with the CPU!

If you want to continue with the hard drive replacement, please refer back to the 8-Bit Guy’s video. Carefully reverse the disassembly process and your machine should be a happily upgrade Mac Mini!
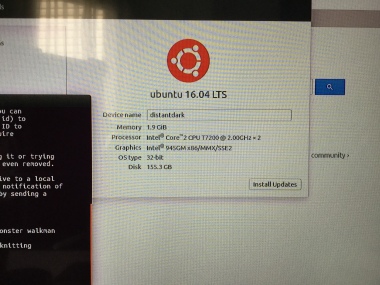
Now for the OS. I was unable and unwilling to get a new Apple OSX operating system on this box. Unable because it’s a huge hassle and I believe you can only upgrade to Mountain Lion. Unwilling because the machine has limited specs and you are not going to get a good experience using this machine with OSX. Ubuntu Linux however will run VERY WELL! In fact, once I upgraded the OS to Ubuntu the machine ran quite nice and I’m able to do pretty much everything I normally do without any lock-ups, spinning wheels of death or slow downs. It’s not a rocket but it’s definitely usable and enjoyable.
To get Ubuntu Linux on your machine, visit the Ubuntu Desktop download section and download the 32-Bit ISO image. Now that you have the image, you will need to put it on a flash drive with your computer. In my case, I used a tool called Apple Pi Baker, which is also a great tool for flashing SD cards for Raspberry Pi. If you have windows or Linux and want to do this, I suggest looking for a good instruction video.
This is an important step: Installing the rEFIt boot menu for the Mac Mini. Go to the rEFIt Project page and download. Then install rEFIt. This will allow you to boot your the Ubuntu installation you flashed onto the flash drive.
Once you place the ISO onto the flash drive and install rEFIt, you will put it in your newly upgraded Mac Mini and hold the “Alt” key after you turn it on. Choose the Flash Drive and boot into Ubuntu and install. I chose to overwrite the entire drive since I do not plan on using this machine to run OSX. Once this process is complete, you will be enjoying a very inexpensive computer that has a low-power usage and fits in a very small space. In addition, Linux is cool and you can brag to your friends. 😉

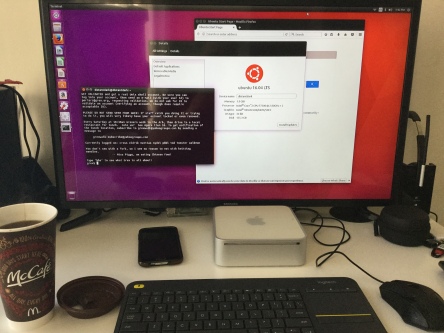
I am using a 32″ Samsung TV for the monitor. I needed to use a DVI to HDMI converter for the video signal. This is my setup!

